10 Best Techniques in Handmade Kitchen Knife Creation
Just as the legendary swordsmiths of old forged blades worthy of warriors, you too can master the art of crafting a kitchen knife that could be the crown jewel of any culinary arsenal.
You'll choose your steel with the discerning eye of a connoisseur, knowing that the soul of the knife lies in its material.
In shaping the blade, your hands will become an extension of ancient tradition, melding with modern precision.
The heat treatment will be a delicate dance of temperature and timing—a pivotal moment where resilience meets the razor's edge.
And as you grind and polish, you'll unveil a sharpness that whispers through tomatoes and roars through roasts.
But these are just the beginnings of your journey into the realm of elite craftsmanship. Beyond the forge, there's a world of aesthetic touches and functional refinements awaiting your discovery.
Stay with me, and uncover the remaining secrets that elevate a mere tool to a handcrafted masterpiece.
Selecting High-Quality Steel
The choice of steel greatly influences a handmade kitchen knife's performance, so it's crucial you select a high-quality alloy that meets the demands of both durability and sharpness. You're looking for a material that not only retains an edge but also resists wear and corrosion. High-carbon steel is often the artisan's choice, known for its superior edge retention and ease of sharpening.
In your search, you'll encounter terms like 'high carbon stainless steel,' which offers a balance between maintaining a sharp edge and resisting rust. However, if you're aiming for the pinnacle of performance, consider a high-carbon alloy like VG-10 or Blue Steel. These are premium materials favored by craftsmen for their exceptional sharpness and edge retention.
It's also worth noting the Rockwell Hardness (HRC) of the steel you choose. A higher HRC means a harder steel, but be wary—too hard, and your knife becomes brittle; too soft, and it'll dull quickly. Aim for a sweet spot, typically between 58 and 60 HRC, which provides a harmonious balance of toughness and sharpness.
Designing the Knife Shape
You'll begin by selecting a blade profile that's not only visually striking but also functional, marrying form with purpose.
Consideration for ergonomics will guide you in crafting a handle that feels as if it was made for your hand alone.
Lastly, you'll infuse your aesthetic sensibility into the design, ensuring the finished knife is a true extension of your personal artistry.
Selecting the Blade Profile
Selecting your blade profile is akin to an artist sketching the initial contours of a masterpiece, demanding precision and a clear vision of the intended function and aesthetic of your handmade kitchen knife. Delve into the essence of your craft; consider the knife's destined tasks. Will it slice delicate tomatoes, disjoint poultry, or fillet fish? Each action requires a distinct edge – a slender, sharp tip for precision, a robust curve for rocking cuts, a straight spine for push-chopping.
Contemplate the steel's width and taper. A gradual slope from spine to edge yields a razor-sharpness, essential for sashimi blades, while a stouter profile affords durability needed for chopping hearty vegetables. Your choice encapsulates the knife's soul, marrying form with function in a harmonious culinary instrument.
Ergonomic Handle Considerations
Having sketched the blade's profile to suit its culinary purpose, it's crucial to craft an ergonomic handle that ensures comfort and control as you wield your culinary creation. The handle must fit seamlessly in your hand, as if it were a natural extension of your arm. Begin by selecting a material that not only complements the blade but offers durability and a comfortable grip. Hardwoods, stabilized woods, or even composites can serve your design well.
You'll meticulously shape the handle, considering the curve of the palm and placement of fingers. Contour it to facilitate a firm, yet not fatiguing grip. Sand the handle meticulously, rounding edges to prevent pressure points. It's about creating a balance between form and function, where every detail enhances the knife's overall performance and user experience.
Aesthetic Design Choices
While shaping the blade, consider how its silhouette not only serves a purpose but also conveys your unique artistic vision. Every curve and angle you craft is a testament to your craftsmanship.
The blade's profile should be a harmonious blend of functionality and beauty, with clean lines that hint at its slicing prowess. Opt for a blade shape that complements the intended use: a broad, curved belly for rocking cuts or a straighter edge for push-chopping.
Consider the point's subtlety—a gentle taper for precision or a robust tip for durability. Balance the blade's aesthetic with its practicality, ensuring it's not only a tool but also a piece of art.
Your design choices should resonate with the user, making the knife not just an instrument, but an extension of their culinary passion.
Forging the Blade
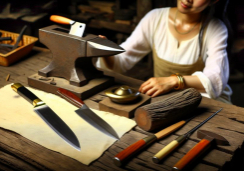
In the hands of a skilled artisan, the transformation of raw steel into a blade's heart begins with the ancient process of forging. You're not just shaping metal; you're creating a legacy, one hammer strike at a time. The forge's roar becomes a rhythm for your work as you heat the steel until it glows a searing orange. It's malleable now, ready for you to impose your will.
With each precise strike on the anvil, you manipulate the metal's structure, refining the grain to enhance the knife's strength and sharpness. It's a delicate dance of heat and pressure, one that requires an intimate understanding of the material. You maintain the steel's temperature, ensuring it doesn't cool too quickly or burn, which could ruin its integrity.
As you taper the blade, creating its profile, you're also mindful of the balance between flexibility and rigidity. The spine must withstand force while the edge must be razor-sharp. It's this attention to detail that sets apart a masterfully forged knife from a merely functional one.
Once the blade's form emerges, you're ready for the quenching—a transformative moment that locks in the blade's resilience. You've laid the foundation, and now the blade is ready for refinement, a step closer to being a chef's trusted companion.
Heat Treatment Processes
After forging and tapering the blade to its ideal shape, the heat treatment process begins, a crucial step where the blade's durability and edge retention are thoroughly enhanced through meticulous thermal manipulation.
You'll first normalize the steel, heating it to a specific temperature—usually between 1,500 to 1,600 degrees Fahrenheit—and allowing it to air cool. This process refines the grain structure, relieving stresses introduced during forging.
Next, you'll subject the blade to austenitizing, the heart of heat treatment. You'll heat the blade to a higher temperature, often above 1,450 degrees Fahrenheit, to transform the steel's microstructure into austenite. It's critical to maintain the temperature within a precise range; too hot and you risk grain growth, too cool and the transformation is incomplete.
The quenching step follows, where you'll rapidly cool the blade in a medium like oil, water, or air. This sudden cooling transforms the austenite into martensite, a much harder phase. The choice of quenching medium affects the cooling rate and the final hardness; oil is a common choice for its moderate cooling speed and reduced risk of cracking.
Precision Grinding Techniques
Once your blade has undergone the critical heat treatment, it's time to focus on precision grinding techniques to shape and refine the cutting edge to perfection. Equip yourself with a high-quality belt grinder, ensuring it's fitted with belts of varying grits. You'll begin with a coarser grit to establish the bevel and progressively move to finer grits for honing the edge.
Keep the blade cool by frequently dipping it in water. Heat can warp the steel, undoing the meticulous heat treatment you've just completed. As you grind, maintain a consistent angle to ensure the bevel is even along the length of the blade. This is where your craftsmanship truly shines, as the angle you choose will determine the knife's sharpness and cutting performance.
In the final stages, switch to a whetstone for the ultimate edge refinement. Here, your movements must be fluid and precise, sharpening the knife with a rhythm that feels almost meditative. With each stroke, you're not just sharpening a blade; you're crafting a legacy.
Finish with a leather strop to polish the edge. The result should be a gleaming, razor-sharp kitchen knife that reflects your dedication to the artisanal craft.
Hand-Shaping the Handle
Having honed your blade to a razor's edge, it's now time to craft a handle that's both a comfortable extension of the hand and a testament to your artistry. The handle isn't merely a tool for grip; it's the soul mate to your blade, the balance point that makes the knife an extension of the chef's will.
Here are the steps to achieve that perfect union:
- Select Your Material: Choose a hardwood or stabilized wood for durability and aesthetics. Exotic woods or even synthetics like Micarta add a unique touch.
- Shape to Fit: Carve the wood to match the tang of the knife. Ensure the handle fits snugly, with a contour that complements the hand's natural grip.
- Sand and Finish: Begin with coarse-grit sandpaper and work your way to a fine grit for a smooth finish. Seal with an appropriate oil or resin to protect the wood and enhance its natural beauty.
Polishing for Sharpness
To achieve the keenest edge, meticulously polish your blade using progressively finer abrasives, ensuring each stroke contributes to the ultimate sharpness. Start with a coarse grit to refine the shape of the edge. This foundational work removes the largest burrs and imperfections. As you move to higher grits, you'll refine the edge even further, honing the steel to a razor-like finish.
You'll need patience and a steady hand as you transition through the grits. Don't rush this process—the quality of your knife's edge depends on it. Pay close attention to the angle at which you hold the blade against the abrasive; consistency is key to achieving an evenly polished edge.
After working through the medium grits, you'll arrive at the fine and ultra-fine abrasives. Here's where your efforts truly shine. The strokes you apply now are delicate, each pass gently coaxing the metal to reveal its sharpest form. This final stage isn't merely about functionality but also the artistry of the craft; a well-polished blade is a testament to your dedication and skill.
Once you've completed the polishing, test the edge for sharpness. It should glide through paper or shaving hair effortlessly, a clear sign of your success in this precise art.
Etching Unique Patterns
Now, you'll harness the acid etching process to imprint your blade with a signature design.
As you apply the resist, ensure your pattern embodies both precision and personal flair.
The careful orchestration of this technique will set your handcrafted knife apart with its unique, enduring artwork.
Acid Etching Process
Immerse yourself in the art of acid etching, where precision and creativity converge to imprint unique patterns onto your handmade kitchen knife. This artisanal technique involves a meticulous process of applying a resistant stencil to the blade and then submerging it in an acid solution that eats away at the exposed metal. Enjoy the transformative journey:
- Design Preparation: Carefully select a design for your stencil that reflects your personal style or the knife's intended use. Precision is key; any slight imperfection will be transferred onto the steel.
- Acid Application: Mix the acid solution according to safety guidelines and immerse the knife for a precise duration, ensuring a sharp, clear etching.
- Neutralization and Polishing: After etching, neutralize the acid thoroughly. Then, polish the blade to reveal a striking contrast between the etched patterns and the gleaming steel.
Designing Blade Artwork
Crafting the visual essence of your kitchen knife begins with designing a unique pattern that will be etched onto the blade, reflecting both artistry and function. You'll delve into the intricate process of bringing your creative vision to life.
Initially, sketch out your designs with precision, considering the blade's curvature and dimensions. Opt for motifs that resonate with your aesthetic while ensuring they don't compromise the knife's integrity.
Utilize resistant stencils to transfer your design onto the metal. You're aiming for a balance between durability and finesse, so your artwork withstands the rigors of a kitchen environment. Remember, the etching medium, whether acid or electrochemical, will react with the exposed areas, so your stencil's precision is paramount.
Your finished piece will be both a culinary tool and a display of exquisite craftsmanship.
Assembling Components
Gathering your blade, bolster, handle scales, and pins, you'll commence the precise task of fitting and securing these components into a singular, well-crafted kitchen knife. This stage demands an artisan's touch, combining strength with a meticulous eye for detail to ensure the knife not only looks exceptional but also performs flawlessly.
Here's how you'll approach this delicate process:
- Alignment: Carefully align the bolster to the blade. It should sit snugly against the shoulder of the blade, ensuring a seamless transition. Once in place, align the handle scales on either side of the tang, checking for an exact fit.
- Attachment: Secure the handle scales to the tang using pins. Drill corresponding holes with precision, making sure they're straight and clean. Gently hammer the pins through the scales and tang, taking care not to mar the materials.
- Finishing: Shape the handle to your desired ergonomics, rounding any sharp edges for comfort. Sand the handle progressively, starting with coarser grits and moving to finer ones for a polished finish. Finally, apply a protective coat to the handle, bolstering its durability and enhancing the wood's natural beauty.
Final Quality Inspection
Upon completing the assembly of your kitchen knife, it's crucial to conduct a thorough final quality inspection to ensure the highest standards of craftsmanship have been met.
Begin by scrutinizing the blade's edge. It should be uniformly sharp along its entire length, free from nicks or dull spots. Test the sharpness with paper or shaving a fine piece of wood; the blade ought to slice through effortlessly, leaving a clean cut.
Next, examine the handle with an artisan's eye. It should feel smooth, with a comfortable grip that's both secure and ergonomically designed for prolonged use. Check for any gaps or misalignments where the handle meets the blade. These can harbor bacteria or compromise the knife's structural integrity.
Inspect the balance by positioning the knife at the bolster — it should sit evenly, neither blade-heavy nor handle-heavy. A well-balanced knife ensures precision and reduces fatigue during use.
What are the Best Techniques to Use When Handcrafting Kitchen Knives?
When handcrafting premium kitchen knives, it’s essential to start with high-quality materials like Damascus steel or high-carbon stainless steel. Pay attention to the blade grind, handle shape, and weight distribution for maximum performance and comfort. Utilizing traditional methods like forging and tempering can also ensure durability and sharpness.
Conclusion
You've now mastered the art of crafting a handmade kitchen knife. From choosing top-notch steel to the final inspection, you have carefully honed every step of the process.
With every precise strike, grind, and polish, you have infused your blade with unmatched sharpness and bespoke elegance.
Remember, your hands etch more than patterns; they carve a legacy of culinary excellence.
Cherish this blend of tradition and precision, for in your grip lies not just a tool, but a custom-made masterpiece, ready to face the culinary adventures ahead.

