Expert Tips: Home Canning Fresh Fruits Tutorial
Certainly, the apocalypse is near, and what better way to prepare than mastering the art of home canning fresh fruits? You've likely heard the buzz about self-sufficiency and the joys of savoring summer flavors in the dead of winter.
As a seasoned expert in the delicate dance of sanitization and sealing, you'll find this tutorial cuts through the pulp fiction of canning myths, laying bare the pits of truth beneath. From selecting the juiciest contenders for your jars to understanding the intricate ballet of water baths versus pressure canning, we'll guide you step by step.
But before you even think about donning your apron and brandishing your funnel, pause and consider the perils of improper technique—botulism is hardly a desirable addition to your peach preserves.
Stay tuned, for we're about to reveal how to sidestep such pitfalls and ensure your pantry is stocked with nothing but the safest, most delightful fruit preserves.
Gathering Essential Equipment
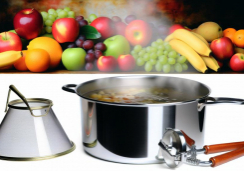
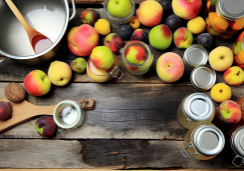
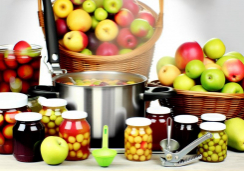
Before you begin the rewarding process of home canning fresh fruits, you'll need to gather some essential equipment, including a reliable boiling water bath or pressure canner.
First off, your basic canning needs include quality canning jars, such as Mason or Ball jars. Inspect these jars carefully for any imperfections that could prevent proper sealing.
You'll also require a pot that's tall enough to accommodate your jars plus one to two inches of water above them, which is vital for water bath canning. To ensure your jars don't rattle or break, a canning rack to fit your pot is a must-have. This rack will keep jars in place while submerged.
To fill the jars efficiently and cleanly, a funnel is your best friend. It keeps the jar rims clean, ensuring a good seal. After you fill the jars, you'll need a non-metallic spatula to remove air bubbles and a jar lifter or tongs to handle the hot jars safely.
Materials to first sterilize your jars and lids are crucial to prevent contamination. Finally, a ladle and a knife will round off your equipment list, helping to pack the fruits and manage their placement within the jars.
With these tools at the ready, you're set for a successful home canning experience.
Preparing Your Fruit Selection
Having gathered the necessary equipment, it's crucial to now focus on selecting and preparing the fruit you'll preserve through canning. Start with the freshest fruits you can find, recently harvested, ripe yet firm to ensure they withstand the canning process without becoming too soft.
Consider these key points as you prepare:
- Select Quality Fruit: Choose fruits free from blemishes, bruises, or diseases to prevent spoilage.
- Measure Appropriately: For a balanced flavor and texture, use about 1 to 2 cups of raw fruit per pint and 2 to 4 cups per quart, depending on the fruit and recipe.
- Prepare in Batches: Work with the amount of fruit that can be swiftly processed; a canner load is typically 9 pints or 7 quarts.
- Use Ascorbic Acid: To prevent browning and preserve color, mix the fruit with ascorbic acid as recommended.
Before you begin to fill jars, ensure the fruit is washed, peeled if necessary, and cut into uniform pieces. After packing the fruit into the jars, wipe the rim to ensure a clean seal, then apply the lids and rings. Follow the recipe's headspace guidelines to allow for expansion.
Process the jars as instructed to seal in the freshness and flavor.
Packing and Jar Sanitization
Ensure that your jars are impeccably sanitized and warm before you start packing them with fruit to prevent contamination and jar breakage. To begin, you'll first sterilize the jars by submerging them in hot water for at least 10 minutes. Use a large pot or a designated water bath canner for this step. Be sure to also boil the lids and rings to keep everything germ-free.
Once your canning jars are clean and still warm, you're ready to fill them with your prepared fruit. Pack the fruit snugly but without crushing it, leaving enough headspace at the top as recommended for the type of fruit you're canning. This space is crucial to allow for the expansion of food and to form a vacuum seal during processing.
Next, remove any trapped air bubbles by gently running a non-metallic spatula or a bubble freer around the inside of the jar. This step is important to ensure proper sealing and to prevent the buildup of excess pressure inside the jar. Wipe the rim of the jar with a clean damp cloth to remove any residue that could interfere with the seal.
Processing Methods Compared
Once you've packed your fruit and sealed the jars, it's crucial to choose the right processing method to safely preserve your harvest. Home canning offers you two primary methods: water bath canning and pressure canning. Understanding the differences will ensure your home-canned fruits are processed correctly and safely.
Here are some key points to consider:
- Water Bath Canning: This method involves submerging your jars in boiling water, making it ideal for high-acid foods like fruits. It's a straightforward technique that you can execute with basic kitchen equipment.
- Pressure Canning: This method uses pressure to achieve higher temperatures than boiling water alone, which is necessary for low-acid foods. A specialized pressure canner is required for this method.
- Importance of Instructions: Adhering to specific instructions and processing times is vital for both methods to ensure a safe seal and prevent foodborne illnesses.
- Equipment: While both start with sterilizing the jars, water bath canning simply uses a large pot, whereas pressure canning requires the aforementioned pressure canner.
Whether you're following time-tested canning recipes or experimenting with new fruit canning ideas, remember that the goal is to achieve a perfect seal to keep your home-canned goods fresh and safe for consumption.
Storing and Monitoring Jars
After your jars are sealed and processed, store them in a cool, dry place away from direct sunlight to maintain their quality. Check your recipe to see how long the jars need to be stored before they reach peak flavor. Some fruits may require a resting period to develop the best taste.
When storing, always make sure to properly vacuum seal your jars. To confirm that they're sealed, press the center of the lid; it shouldn't flex or pop back. If it does, refrigerate the jar and consume the contents within a few days. Remember to cover with hot water during processing, ensuring that there's at least 1 inch of water above the jars with lids to achieve the recommended headspace.
It's important to keep an eye on your jars during storage. Look for any signs of spoilage, such as off-odors, discoloration, or leakage. If you suspect a jar is compromised, discard it immediately to prevent the risk of foodborne illness.
Frequently Asked Questions
How to Can Fruit for Beginners?
Start by selecting ripe fruits and sterilize your jars. Choose the right lids, prepare sugar syrups, and adjust acid levels. Master packing methods, leave proper headspace, and process jars in a water bath.
How Do You Keep Fruit From Floating When Canning?
To prevent fruit from floating, choose appropriate jar sizes and packing methods. Increase fruit density by using heavier syrup and remove bubbles before sealing. Opt for hot packing and thorough heat processing during canning stages.
Which Fruit Is Most Suitable for Canning?
You'll find peaches ideal for canning due to their acidity, texture retention, and seasonal peak. Opt for medium jar sizes, water bath method, and light sugar syrup to best preserve nutrition and flavor.
Do You Have to Peel Fruit Before Canning?
You don't always have to peel fruit before canning. Consider the fruit's texture, pectin levels, and flavor retention. Use proper jar selection and safety precautions, and adjust acid as needed for preservation benefits.
Conclusion
Now you're equipped with the know-how to preserve your favorite fruits through home canning. Remember to keep your equipment clean, prep your fruit carefully, and choose the right processing method.
Store your jars in a cool, dark place and check them regularly. By following these expert tips, you'll enjoy delicious, home-canned fruits year-round.
Happy canning!

