4 Essential Steps to Season Your Cast Iron Skillet
You might think that seasoning your cast iron skillet is akin to performing a sacred ritual, requiring precision and reverence that could rival ancient ceremonies. In essence, it's not far from the truth; a well-seasoned skillet is the cornerstone of a plethora of culinary adventures waiting for you in your kitchen.
You'll first need to confront the original state of your skillet—whether it's brand new or a hand-me-down, the initial wash is a pivotal step that sets the stage for what's to come.
Then, armed with your choice of oil, you'll embark on a transformative journey from dull, sticky iron to a slick, non-stick companion ready for anything you throw at it—or in it, to be more precise.
But before you can bask in the glory of your skillet's full potential, there are critical nuances to the oiling and heating process that you must master.
Let's explore these steps, ensuring that you don't miss a beat on your way to creating the perfect cast iron surface that will have chefs nodding in approval.
Clean Your Skillet Thoroughly
To keep your cast iron skillet in prime condition, start by cleaning it with hot water and a brush or sponge immediately after use. This simple yet crucial step ensures that you remove any food particles or residue that could interfere with the seasoning process. When you clean a cast iron, it's vital to avoid soap or harsh cleaning agents, as these can strip the skillet's seasoned surface of its protective layer.
After washing, thoroughly dry your skillet to prevent rust from forming. Any lingering moisture can be detrimental to the hard-earned patina you've built up. To season a cast iron skillet properly, maintenance is key. Once dry, apply a thin layer of oil to coat the cookware's surface. This reinforces the layer of seasoning that makes your cast iron skillet a non-stick and rust-resistant piece of culinary art.
Apply a Thin Oil Coating
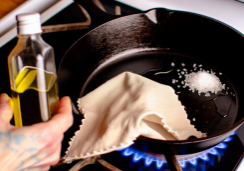
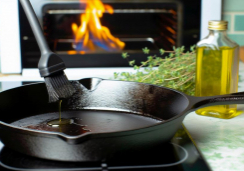
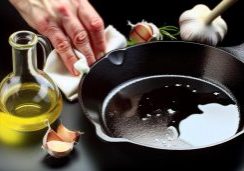
Begin by preheating your cast iron skillet. Use a paper towel to apply a thin, even coating of oil across its entire surface. For seasoning cast iron, the choice of oil matters. Select a neutral cooking oil like vegetable oil, which has a high smoke point essential for the oiling and heating process. It's crucial to maintain a thin layer to ensure the oil baked onto the skillet forms a durable seasoning rather than a sticky residue.
As you apply a thin oil coating, pay close attention to cover all areas, including the sides and the bottom. This layer of oil is the foundation of your skillet's non-stick patina. After coating, meticulously wipe off any excess oil with a clean paper towel. Over-application can lead to drips and uneven seasoning, which you want to avoid.
Bake the Skillet Upside Down
After applying the oil, preheat your oven to 400°F and place your skillet upside down on the middle rack to ensure even seasoning during baking. This position allows for any excess oil to drip off, preventing pooling and ensuring a smooth, consistent protective layer. The skillet's inverted position is also pivotal in the process called polymerization, where the oil transforms into a hardened, durable coating.
To catch any drips and protect your oven, place a large baking sheet or aluminum foil on the bottom rack. This setup will save you from a messy cleanup later. The seasoning process is a crucial step in maintaining the integrity of your Lodge seasoned cast iron or any other cast iron cookware. While many modern skillets come pre-seasoned, reinforcing this layer is beneficial.
The typical temperature for seasoning ranges from 450-500 degrees F, but maintaining your oven at 400°F is a safe bet for a thorough bake without risking damage to your skillet. After an hour, turn off the oven and let the skillet cool down completely inside. This gradual cooling helps the newly formed protective layer to settle and adhere to the surface, culminating in a non-stick, rust-resistant finish.
What are the essential steps for seasoning a cast iron skillet?
To begin seasoning your cast iron skillet, start by thoroughly washing it with hot, soapy water and drying it completely. Then, apply a thin layer of vegetable oil or melted shortening to the skillet’s surface, inside and out. Bake it upside down in a 350°F oven for one hour. Repeat as needed.
Cool and Store Properly
Once your cast iron skillet has cooled to room temperature, it's crucial to store it correctly to prevent rust and maintain its well-seasoned surface. Patience is key; let it cool in the oven or on the stovetop to ensure it's completely cooled. Moisture is the enemy of a good layer of seasoning, so a dry storage spot is essential for keeping your cast iron seasoned and ready for your next culinary adventure.
Before you put it away, give your skillet a light coat of oil to preserve the protective coating that you've worked so hard to build. This oil layer acts as a barrier against moisture and keeps rusty cast iron at bay. When you store properly, you're ensuring the longevity and performance of your cookware.
Be cautious not to stack other pots or pans on top of your skillet. Heavy cookware can scrape off the layer of seasoning you've developed, and abrasive surfaces can lead to scratches and damage. Instead, use a soft, protective cover or cloth to shield your skillet from dust and debris.
Conclusion
You've now mastered the art of seasoning your cast iron skillet! Remember, it's crucial to keep it clean, coat it lightly with oil, and bake it upside down to achieve that perfect non-stick surface.
Let it cool in the oven to avoid rust.
Treat it right, and your skillet will be your trusty companion for years, turning out flawless sears and hearty meals.
Happy cooking!

