8 Steps to Perfectly Season Your Cast Iron Skillet
Nearly 75% of seasoned cooks agree that a well-seasoned cast iron skillet is essential for certain recipes, yet a surprising number of home chefs remain intimidated by the process of seasoning their own.
As you stand in your kitchen, you might be holding a cast iron skillet, pondering its matte surface, and wondering how to elevate it to a glossy culinary treasure. It's a craft, really, a simple yet precise series of steps that promise to transform your skillet into a non-stick wonder that can add depth to your dishes.
You're about to embark on an age-old tradition that's been passed down through generations of cooks, and while the process may seem shrouded in mystery, it's remarkably straightforward. Follow along as we guide you through the essential techniques to achieve that perfect sheen, and discover how each step serves a specific purpose in creating a durable and slick surface that even your grandmother would be proud of.
Just remember, a perfectly seasoned cast iron skillet isn't just about good looks; it's the secret to impeccable flavor and texture in your cooking that only gets better with time.
Clean Your Skillet Thoroughly
To maintain your cast iron skillet's seasoned charm, start by scrubbing away food particles with a stiff brush or scraper right after cooking. This proactive approach ensures you clean your skillet thoroughly without much fuss. While you might be tempted to use soap, resist it. Soapy water can strip the hard-earned seasoning—a cast-iron skillet's protective and non-stick coating. Instead, rinse with hot water to loosen any stubborn bits.
If you encounter a tough spot, don't reach for scouring pads. These can damage the surface. For those pesky residues, heat the skillet on the stovetop and use salt and oil as a natural abrasive combo. This method not only helps to remove rust but also aids in maintaining the skillet's integrity.
Once the pan is clean, it's crucial to dry it thoroughly. Leftover moisture is the enemy, paving the way for rust and a slew of other issues. After drying, apply a light coat of oil to protect the surface. This simple act of care post-washing fortifies the skillet and prepares it for future culinary adventures.
Remember to store your skillet in a dry place, safeguarding it from moisture and ensuring it's ready for your next creation.
Dry the Skillet Completely
After washing your skillet, it's crucial to dry it meticulously to avoid rust formation.
Gently heat it on the stove to evaporate any lingering moisture—this step ensures a pristine surface for seasoning.
Then, use a towel-drying technique, wiping the skillet with a clean cloth until it's bone-dry and ready for oiling.
Avoid Rust Formation
Always remember to dry your cast iron skillet thoroughly, as any lingering moisture can lead to rust and compromise its longevity. After washing, use a towel to dry it completely before storing. Don't cut corners here; let the pan air dry entirely to ensure there's no hidden moisture that could cause damage.
Vigilance in drying your skillet is crucial in maintaining the seasoning process, which provides a protective layer for your cast iron. To fortify this layer, after drying, apply a thin layer of oil—preferably a cooking oil like vegetable oil with a high smoke point—to the surface. This simple step will bolster your skillet's defenses against rust, ensuring you can use your cast iron for years to come.
Heat Evaporates Moisture
Harness the power of heat to ensure your cast iron skillet is bone-dry and ready for seasoning, as residual moisture is the enemy of a robust seasoning layer. To prevent rust and enable the process called polymerization, where oil baked onto the cooking surface creates a layer of carbonized protection, you must start with a completely dry pan.
After washing your new cast iron skillet, use a clean towel to wipe away any water droplets. Then, place the skillet on the stove over high heat for a few minutes to evaporate any lingering dampness. Only when the hot pan is moisture-free can you apply a thin layer of oil.
This step is foundational for a non-stick, well-seasoned cooking surface.
Towel-Drying Technique
Before you store your cast iron skillet, grab a lint-free towel and meticulously dry every inch, ensuring not a single drop of water remains to safeguard against rust and maintain the integrity of your skillet's seasoning. Focus on tricky spots like the handle and edges, where water might hide. Flip the skillet upside down and check the bottom to ensure it's completely moisture-free.
After drying, if there's any excess oil, lightly buff the surface with a paper towel. This will leave a light coat that's just right—you don't want to use too much or you'll make a sticky mess, but don't rub so hard that you remove a bit of seasoning.
Your towel-drying technique is crucial to the longevity and performance of your cast iron companion.
Apply a Thin Oil Layer
Coating your cast iron skillet with a thin layer of oil ensures a non-stick surface and prevents rust, enhancing your pan's longevity and performance. The key to successful seasoning isn't just the oil you choose, but also how you apply it.
Start by selecting a suitable oil with a high smoke point, such as canola oil or vegetable shortening. These options are ideal for iron skillets because they bond well with the surface during the heating process.
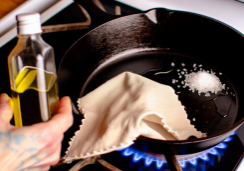
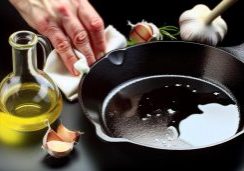
Pour a small amount of oil into the skillet. You'll only need enough to cover the entire surface with a slick sheen—think more of a mist than a puddle. Using a clean paper towel or lint-free cloth, spread the oil across the cooking area, edges, and underside of the pan. Ensure the layer is as thin as possible; a thick layer can turn sticky and uneven when heated.
Check for any excess oil and wipe it off thoroughly. The aim is to leave your skillet with a barely visible, even layer that will bake into a hard, protective coating. Remember, when it comes to seasoning iron skillets, less is more. A thin, consistent layer will yield the best results.
Wipe Off Excess Oil
After applying oil to your cast iron skillet, it's crucial to wipe away any excess to ensure a perfectly seasoned surface. When your cast iron cookware comes out of the oven, grab a cloth to tackle this important step.
A thin, even layer of oil is your goal; leaving too much on can result in splotches and those unwanted drips that mar the layers of seasoning you're working so hard to build. Wipe off excess oil meticulously, focusing on the entire pan's surface. This step is the secret to avoiding a sticky or tacky finish once the skillet cools down.
Keep in mind that a new pan needs a good layer of seasoning, but not a thick one. Using a vegetable oil or any seasoning oil of your choice, ensure that you leave behind just enough to coat the skillet without pooling.
A well-seasoned cast iron skillet is a marvel in the kitchen, but achieving that perfect patina requires attention to detail. By wiping off the excess oil after each application, you create a durable, non-stick surface that will improve with every use.
Preheat Your Oven
To ensure your cast iron skillet develops a resilient seasoning, always preheat the oven to the temperature recommended for the seasoning process. This crucial step can't be skipped, as a properly preheated oven is key to the oil polymerizing correctly, creating that coveted protective coating on your seasoned cast iron.
Before you slide the skillet in, check that your oven has reached the right heat level. If you're using flaxseed oil, often hailed as the best oil for seasoning because of its drying properties, you'll want to hit that exact temperature sweet spot to optimize the seasoning's adherence to the cast iron.
While you're waiting for the oven to preheat, place a baking sheet or piece of aluminum foil on the bottom rack. This will catch any drips and save you from a cleaning headache later.
Once the oven signals it's ready, it's showtime for your skillet.
Bake the Skillet
Now that your oven is preheated, it's time to focus on your skillet. Make sure you've applied an even coat of oil to the entire surface of the pan to ensure a slick, non-stick finish.
You'll need to bake your skillet for a full hour at the optimal temperature range of 250 – 350 °F to properly polymerize the oil.
Preheat Your Oven
Ensure your oven reaches a steady 400°F before carefully placing your cast iron skillet upside down to bake for an hour, setting the stage for a robust seasoning.
The best oil to use for seasoning is often debated, but many swear by flaxseed oil for its drying properties, or you might opt for melted shortening.
Preheating is crucial; it ensures your skillet absorbs the oil uniformly, creating that non-stick surface you're after.
Once the hour is up, let the skillet cool in the oven before you handle it.
For the ultimate finish, repeat the oiling and baking process a couple more times. Remember, patience is key when you season a cast-iron—each layer will contribute to a more durable, slick cooking surface.
When it's cool, put it back in its rightful place, ready for your next culinary adventure.
Apply Oil Evenly
Having preheated your oven, it's time to focus on coating your cast iron skillet with a thin, even layer of oil before baking it to perfection.
To achieve a well-seasoned cast iron surface, apply oil evenly across the entire skillet. Use a brush or cloth to spread a light coat, ensuring that no spots are missed.
Often-suggested flaxseed oil produces a durable seasoning, but some chefs swear by animal fat as the best for seasoning.
After coating, place the skillet upside down in the oven, set to a specific temperature—typically around 400°F. This position allows excess oil to drip off, avoiding pooling.
Bake for an hour, then let it cool. Repeat this process for optimal results, and soon you'll be using cast iron like a pro.
Optimal Baking Duration
Set your oven to 400°F and bake your cast iron skillet for one hour to create a strong, durable seasoning. This optimal baking duration allows the oil to polymerize and form a fast layer of seasoning, essential for a non-stick, rust-resistant surface.
Make sure to put the pan in the oven upside down to ensure even heat distribution and prevent pooling of the oil.
Once baked, let it cool in the oven to avoid thermal shock. This step is crucial in the iron seasoning process, giving your cast iron the care it deserves.
For best results, repeat this seasoning process two or three times a year. Remember, patience during seasoning will reward you with a perfectly seasoned skillet for years to come.
Cool and Repeat Process
Once your cast iron skillet has cooled down completely, wipe away any leftover oil before embarking on a second or third seasoning to achieve the perfect non-stick surface. It's crucial to let the PAN COOL; this step solidifies the initial layer of seasoning, creating a base for additional layers.
The cool and repeat process is essential for a well-seasoned cast iron pan. Each time you cook, the surface improves, but to start strong, repeat the seasoning two or three times. This builds up the protective coating that's synonymous with a perfectly seasoned cast iron skillet.
Ensure you're giving your skillet the care it needs; a good idea is to keep the surface free of lingering food particles that could flake off with use, compromising your efforts.
What Are the Additional Steps Needed to Perfectly Season a Cast Iron Skillet?
Before you season your cast iron skillet, make sure to thoroughly clean it with hot water and a stiff brush. Once dry, apply a thin layer of vegetable oil and wipe off any excess. Bake the skillet upside down in the oven at 350°F for one hour. Repeat this process a few times for best results.
Store Skillet Properly
After seasoning your cast iron skillet multiple times, it's crucial to store it properly to preserve the non-stick surface you've worked hard to create. Your seasoned cast iron isn't just a cooking tool but an investment, and how you store it can affect its longevity and performance.
Firstly, ensure your cast iron pan is bone dry after each use and before storage; lingering moisture is the enemy and can lead to rust. If you're using Lodge seasoned cast iron or any other brand, the principle remains the same. Find a cool, dry place in your kitchen to store your skillet. This could mean avoiding areas right above the stove or in damp basements.
To prevent scratches or damage to the seasoned surface, especially if you're stacking your cookware, place a kitchen towel or paper towel between each cast iron and carbon steel item. This little buffer can keep your skillet looking brand new.
Also, refrain from storing your skillet with the lid on; trapped humidity can undo your seasoning efforts. If you're planning not to use your skillet for an extended period, give it a light coat of olive oil before storing. This helps maintain the seasoning and ensures it's ready to go when you are.
Conclusion
Now you've got the know-how to season your cast iron skillet like a pro! Just remember to keep it dry, oiled, and loved with regular use.
This simple routine will reward you with a trusty, non-stick companion for all your cooking adventures. Go ahead, bake, sear, and sauté with confidence—your perfectly seasoned skillet won't let you down.
Keep it up, and your skillet will only get better with age!

