Revitalize Your Cast Iron: Latest Seasoning Techniques
Have you ever wondered if the age-old theory that a well-seasoned cast iron skillet can rival the performance of modern non-stick cookware holds water? You're not alone.
As a culinary aficionado, you know the value of a perfectly seasoned cast iron piece—it's an heirloom, a testament to tradition, and a cornerstone in the kitchen. But with new seasoning techniques constantly emerging, it's crucial to stay informed.
You'll find that these latest methods not only simplify the process but also enhance your cast iron's durability and non-stick qualities. Imagine your skillet, reborn with a slick, robust surface that improves with every use—let's explore how that can become your reality.
Yet, as you consider giving your trusty skillet a new lease on life, remember that the true test lies not in the seasoning itself, but in how it elevates your cooking experiences and the flavors that come forth from its seasoned depths.
Assessing Your Cast Iron
Before you set out to rejuvenate your cast iron skillet, it's crucial to assess its current condition, pinpointing signs of wear such as rust, flaking seasoning, or stuck-on food residue.
As a cherished piece of cast iron cookware, it's paramount to understand its state. Begin by assessing the cooking surface. Is there a hint of rust? This often occurs due to exposure to moisture or improper storage. Don't fret; you can remove rust with methods tailored to the severity of the issue. For light rust, a scrub brush may suffice. For more stubborn cases, fine steel wool is your ally, gently coaxing the rust away without damaging the underlying metal.
Next, inspect the layer of seasoning. Is it flaking off? This isn't a sign of damage but indicates the need for a refresh. A well-seasoned cast iron skillet should have a smooth, black patina. If yours doesn't, it's time for a seasoning update.
Check for stuck-on food, a common culprit behind a less-than-perfect cooking experience. This often results from insufficient oil or a seasoning layer that's seen better days. With a little elbow grease and the right techniques, you'll have your cast iron skillet back to its former glory in no time.
Stripping Old Seasoning
Having identified signs of wear on your cast iron, it's essential to strip the old seasoning to lay the groundwork for a fresh, durable coating. Your beloved skillet has served you well, but now it requires some TLC to continue being your go-to for cast iron cooking.
Begin by choosing a method to remove that stubborn old seasoning. Oven cleaning cycles can bake off the layers, or you might opt for a more hands-on approach with electrolysis for a thorough cleanse. Once the surface is bare, tackle any rust spots with vinegar or a specialized rust remover to ensure a pristine base.
Next, grab a scrubber to remove lingering debris. A piece of steel wool or a stiff brush will do the trick. Scrub vigorously to reveal the raw surface underneath, ready to absorb a new layer of seasoning. After scrubbing, rinse your skillet well and dry it immediately—any moisture left behind can invite rust.
Now, it's time to re-season. Coat your pan with a thin layer of high-smoke-point cooking oil, wiping away excess oil to prevent stickiness. Place it in the oven and bake the oil into the skillet, creating a new, resilient layer of seasoning that'll make your next culinary adventure even more delightful.
Neutralizing and Rinsing
Once you've scrubbed away rust and debris, it's crucial to neutralize your cast iron with warm, soapy water to ensure a perfectly clean surface for seasoning. Using soap on your pan might seem taboo, but it's essential for removing any lingering acidic foods that can break down your pan's seasoning. Gently scrub the pan well with a nylon brush or non-scratch pad, ensuring that you've got every nook and cranny.
After the thorough cleanse, rinse the pan with warm water to wash away any soap residue. It's important to dry your pan completely to prevent rust from sneaking back. You can either towel-dry it or place the pan in the oven on a low setting for a few minutes to evaporate any moisture. Once dry, it's time to apply a thin layer of cooking oil. This acts as a barrier and starts the foundation for your pan's new seasoning.
Heat your oven to a moderate temperature, place the pan upside down on the middle rack with a sheet of aluminum foil below to catch any drips. Bake the pan for an hour, then turn off the oven and leave the pan inside to cool down slowly. This process will further bond the oil to your cast iron, reviving its cherished non-stick qualities.
Applying New Seasoning
To ensure a robust and enduring non-stick surface, apply a high oleic oil like safflower or canola to the entire cast iron pan before heating it in the oven. These oils not only create a formidable seasoning but also boast a high smoke point, vital for the process.
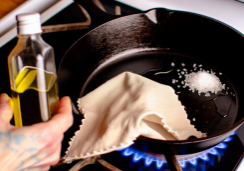
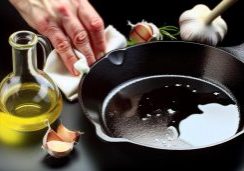
Start by drizzling a modest amount of your chosen oil—canola oil is a reliable and accessible option—over your cherished cast iron pans.
Next, grab a paper towel and gently rub the oil across every inch, creating an even layer without any excess. You're aiming for a sheer coat; think of it as a protective veil rather than a heavy blanket. Ensure the inside, the handle, and even the underside don't miss out on this spa treatment.
Crank your oven up to 350˚F and nestle the pan upside down on the middle rack. This orientation prevents fat or oil from pooling and ensures an even cure. After patiently baking for one hour, your pan will emerge closer to its resilient, non-stick glory. But don't rush! Turn off the heat and let it cool in its warm haven.
Then, with another paper towel, wipe off any remaining oil. Remember, great layers of seasoning are born from repetition and patience.
Is There a Difference in Seasoning Techniques for Cast Iron Skillets?
When it comes to cooking with cast iron, how you season your cast iron skillet can make a difference. Some swear by using flaxseed oil for a strong, durable seasoning, while others prefer using vegetable oil or lard. Ultimately, the technique you use to season your cast iron skillet depends on personal preference and desired results.
Baking to Perfection
As you watch your cast-iron emerge with a new sheen from its oil massage, it's time to focus on baking it to a flawless finish. The secret to a perfect non-stick surface lies in the precision of this next step.
Begin by preheating your oven to a steady 350˚F. This optimal temperature will ensure your cast-iron cookware undergoes the transformation it deserves.
Once your oven is ready, place your cast-iron skillet upside down on the middle rack. This position prevents oil from pooling and ensures an even seasoning coat. Don't forget to lay a sheet of aluminum foil on the lower shelf; it's your best defense against any pesky oil drips.
Now, the cooking magic happens as you bake your cast-iron pan for a full hour. This process bonds the oil to the iron, creating that sought-after non-stick layer. Patience is key—once the timer dings, don't rush. Turn off the oven, but leave the pan inside to cool completely. This gradual cooling prevents thermal shock and further cements the seasoning.
When it's cool, take a paper towel and wipe off any excess oil. Ensure your cast-iron cookware is bone-dry to fend off rust. If your pan is sticky, you've used too much oil; simply bake it a bit longer next time.
Now, your Cast Iron is ready for countless cooking adventures, with a surface that's seasoned to perfection.
Conclusion
You've done it! Your cast iron is reborn, boasting a slick, protective coat from the latest seasoning methods. With every use, it'll just get better, forming that coveted non-stick surface.
Just remember to keep it dry and give it a light oil rub after cleaning.
This isn't just cookware; it's a legacy in the making. So, go ahead, fry, sear, and sauté to your heart's content—your revitalized cast iron is ready for all culinary adventures!

