Top 10 Tips for Seasoning Your Cast Iron Skillet
Is it really true that a well-seasoned cast iron skillet can rival the best non-stick pans? If you're pondering this question, you're not alone. Seasoning your cast iron skillet might seem like a culinary rite of passage, but it doesn't have to be shrouded in mystery.
You've likely heard a variety of dos and don'ts for creating that perfect, slick patina that both protects your skillet and provides a superior cooking surface. As you stand armed with your skillet, ready to embark on this time-honored task, remember that technique is everything. From selecting the right oil to understanding the nuances of temperature and timing, each step you take affects the outcome.
So, let's unpack these top tips that will help you elevate your skillet from merely functional to phenomenally non-stick, and discover how a little know-how can transform your cooking experience with one of the kitchen's most versatile tools.
Clean Skillet Thoroughly
Before seasoning your cast iron skillet, you'll need to clean it thoroughly. Start by scouring the pan under hot water to strip away any wax or protective oil. This initial step is crucial as it prepares the surface for the seasoning process, ensuring that the oil bonds effectively with the metal.
You might encounter stubborn residue or even rust, which can be addressed using a stiff brush along with a mixture of kosher salt and oil. The abrasive nature of the salt coupled with the lubricating effect of the oil helps to dislodge and remove rust without damaging the skillet's surface.
If the skillet is particularly grimy, don't hesitate to use soap or scouring pads. Although there's a common belief that soap should never touch cast iron, it's actually fine to use when you're about to re-season the pan. Just make sure to rinse the skillet thoroughly with hot water after using soap to ensure no residue remains.
Dry Completely
Ensure your cast iron skillet is bone-dry, either by wiping it with a clean cloth or heating it on the stove, to prevent rust and prepare it for a successful seasoning. Moisture is the enemy of cast iron, as it can lead to rust, which undermines the integrity of your pan's surface. After thoroughly cleaning your skillet, take the time to wipe it dry meticulously. If any moisture lingers, it'll interfere with the layer of oil baked onto the skillet during the seasoning process.
If the pan is still damp after wiping, don't hesitate to place it over a low heat on your stove. Allow the skillet to warm until all traces of moisture have evaporated. This heating method not only ensures complete dryness but also opens up the pores of the cast iron, making it more receptive to the oil that you'll apply for seasoning.
Once you're confident that the cast iron skillet is fully dry, you're ready to move on to the next step. Remember, a perfectly dry skillet is essential for creating that non-stick surface and ensuring the longevity of your pan. The right heat treatment now will mean less smoke and better results when your skillet hits the oven for the final seasoning.
Choose the Right Oil
Having confirmed that your cast iron skillet is completely dry, it's crucial to select the proper oil for seasoning, one that has a high smoke point and is free of any flavors that could impact your food. The best oil for this task will have a smoking point high enough to create a durable, non-stick surface without burning away during the seasoning process.
Vegetable oil, canola oil, and soybean oil are excellent choices, each boasting a high smoke point suitable for seasoning your cast iron. These oils aren't only effective but also widely available and cost-effective. They'll give you the slick, protective layer you're aiming for without leaving any odd flavors behind.
It's important to steer clear of oils that have low smoke points, such as unrefined coconut oil or butter. These can burn easily, compromising the seasoning. Similarly, while olive oil is a kitchen staple, its lower smoking point makes it less ideal for seasoning a cast iron skillet.
When you season a cast iron, also watch out for oils labeled as 'light' or 'refined,' as these might contain additives or have a flavor that could transfer to your food. Stick with 100% pure oils with a neutral taste to ensure the best results.
Apply a Thin Coat
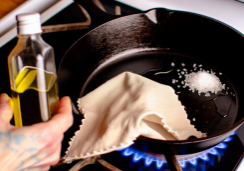
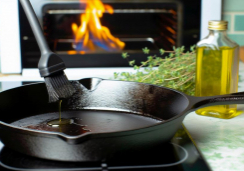
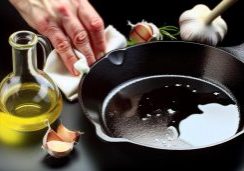
After selecting the appropriate oil for seasoning your cast iron skillet, you'll need to apply a thin, even coat to the entire surface. Make sure to cover the pan's interior, exterior, and handle, using a clean cloth or paper towel to avoid excess.
This step sets the stage for uniform heating, which is essential for a well-seasoned skillet.
Choose Right Oil Type
Selecting an oil with a high smoke point is crucial when seasoning your cast iron skillet, as it ensures a durable and effective non-stick surface. Oils that boast a high smoke point, such as vegetable shortening or some types of cooking oil, are ideal for creating that protective layer. They can withstand the high temperatures required for polymerization, the process that bonds the oil to the skillet's surface.
When applying the oil, use a paper towel to coat the skillet evenly. Remember, a thin layer is key; too much oil can lead to a sticky finish. Opt for oils that are flavor-neutral to maintain the versatility of your cast iron skillet. Avoid oils with a low smoke point, as they're less effective and could impart off-flavors onto your food.
Heat Evenly After Coating
Once you've coated your cast iron skillet with a high-smoke point oil, it's crucial to heat it evenly to ensure the oil polymerizes properly, creating that coveted non-stick surface.
Place your seasoned cast-iron skillet on the stove and set it to medium heat. This allows the entire pan to warm gradually, avoiding hot spots that can lead to an uneven layer of seasoning.
Aim for a consistent, golden sheen across the surface, indicating that the thin layer of oil is bonding well. Repeat this process several times to build up a durable, slick coating.
Heat in the Oven
To properly season your cast iron skillet, follow these steps:
- Preheat your oven to a minimum of 450°F to ensure it's ready for the skillet's oil coating. This high heat opens up the pores of the metal, allowing the oil or fat to penetrate deeply.
- Apply a thin, even layer of your chosen oil across the entire surface of the skillet, including the outside and handle. Avoid pooling or excess oil to prevent sticky spots.
- Place the skillet upside down in the oven to promote an even seasoning layer and catch any drips. Heat the skillet for about 45 minutes to an hour. This time allows the oil to polymerize and form a hard, protective layer, giving your cast iron cookware its non-stick properties and resistance to rust.
- Once the time is up, turn off the oven and let the skillet cool down completely inside. This slow cooling process further solidifies the bond, ensuring your cast iron pan is well-seasoned and ready for its next culinary adventure.
Let It Cool
After seasoning your cast iron skillet in the oven, let it cool down naturally inside to maintain the integrity of the newly formed non-stick surface. This step is as crucial as the seasoning itself. The skillet's residual heat will continue to polymerize the oil, reinforcing the protective layer you've just created. By allowing the skillet to cool gradually, you're ensuring the longevity of this essential kitchen tool.
It's tempting to speed up the process, but never plunge a hot pan into cold water. This can cause thermal shock, potentially warping or cracking your cast iron skillet. Instead, remove a bit of heat by setting the skillet upside on the stovetop or a heat-resistant surface. This slow cooling process not only preserves the non-stick qualities but also staves off rust and prevents moisture buildup – enemies of cast iron and carbon steel alike.
Once completely cool, a quick wipe with a dry cloth will remove any lingering moisture. Only then should you store your cast iron. By letting it cool thoroughly, you're protecting your investment and ensuring that each time you season your cast-iron skillet, it performs better than the last.
Repeat the Process
Achieving the perfect non-stick surface on your cast iron skillet often requires repeating the seasoning process several times. It's not a one-and-done deal; you'll need to layer up the seasoning to get that ideal cooking surface.
After your first round of seasoning, let the skillet cool as instructed, then prepare to repeat the process.
Start by preheating your oven as before. While it's warming up, apply a light coat of melted shortening or your oil of choice to the entire skillet, ensuring you cover every inch. Wipe off any excess—you want it to be a very thin layer. Then, place the skillet upside down in the oven and bake it for another hour at the same temperature as your initial round of seasoning.
This step-by-step process, called polymerization, creates a layer of carbonized oil on the surface of the skillet—an iron seasoning essential. Each repetition of the process adds another layer, enhancing your skillet's non-stick qualities and its resistance to rust.
You'll likely want to do this at least two or three times, especially if it's a new skillet or one that's been stripped down to bare iron. So, don't shy away from repeating the process; it's the key to building up a robust, enduring non-stick surface.
Cook Fatty Foods Initially
Once you've layered up the seasoning by repeating the oven process, begin fortifying your cast iron skillet's surface by cooking fatty foods like bacon or sausage. These types of fatty foods are rich in animal fat, which is ideal for the initial use of your iron skillet. As you cook, the fats will melt and coat the cooking surface, filling in any microscopic imperfections and creating a slick, non-stick layer.
The animal fat from these foods has a low smoke point, which means it will polymerize and bond to your cast-iron skillet's surface at a relatively low temperature. This bonding is exactly what you're aiming for—it's the foundation of a good seasoning that not only prevents rust but also ensures that your skillet becomes more non-stick with each use.
Remember to start at lower temperatures to avoid burning the fat and damaging the developing seasoning. As the layers of seasoning build up, you'll be able to gradually increase the heat. This methodical approach ensures that your cast-iron skillet will be well-seasoned and will improve with every batch of fatty foods you cook, paving the way for a lifetime of excellent cooking experiences.
Store Properly
To maintain your cast iron skillet's pristine seasoning, always store it in a dry, well-ventilated area. Moisture is the enemy of a well-seasoned cast-iron pan, leading to rust and a degraded cooking surface. After every use, ensure that you've dried your pan completely before putting it away. It's not just about wiping it down; if possible, place the skillet back on the stove over a low flame to evaporate any residual moisture.
When you store your cast-iron skillet, avoid using airtight plastic bags or containers, which can trap humidity and compromise the seasoning. Instead, consider hanging your skillet on a pot rack or placing it on a shelf where air can circulate freely around it. If you must stack your skillet with other cookware, protect the surface by placing a paper or kitchen towel in between to prevent scratches and to absorb any potential moisture.
Can You Provide Specific Tips for Seasoning a Cast Iron Skillet?
The best way to season a cast iron skillet is to start by cleaning it thoroughly with hot, soapy water and drying it completely. Next, apply a thin layer of vegetable oil and bake the skillet upside down in a 350°F oven for one hour. Repeat this process several times for optimal seasoning.
Regular Maintenance
Maintaining your cast iron skillet requires a few simple but crucial steps to ensure its longevity and cooking performance.
After each use, it's essential to clean your skillet promptly to prevent food from sticking. Forgo soap, as it can strip away the seasoning; instead, opt for a stiff brush or scraper to remove any remnants. Lodge seasoned cast iron skillets, renowned for their durability, still need this regular care to maintain their finish.
Once you've cleaned your skillet, thoroughly dry it to ward off rust. Even a small amount of lingering moisture can lead to corrosion, which undermines the skillet's seasoning and quality. After drying, apply a light coat of oil to the skillet's surface. This routine maintenance step fortifies the seasoning, reinforcing the non-stick surface that cast iron is celebrated for.
Lastly, store your skillet in a dry place. This simple practice is pivotal in preventing rust and maintaining the integrity of the skillet. Should you notice any rust or if the skillet's performance falters, consider re-seasoning it in the oven. This method strengthens the oil's bond to the iron, reviving the skillet to its optimal condition.
Conclusion
Now that you've got the hang of it, keep your cast iron skillet in top shape. Clean it without soap, dry it off well, and coat it with the right oil before you heat it up in the oven.
Remember, a few rounds of seasoning make a big difference. Start your cooking adventures with fatty foods and store your skillet in a dry spot.
Stick with regular upkeep, and your trusty skillet will reward you with years of non-stick cooking.
Enjoy the culinary journey!

