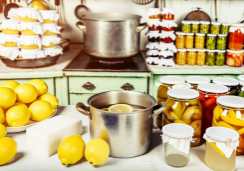
9 Steps to Preserve Seasonal Fruits at Home
Imagine the burst of flavor as you bite into a juicy peach, its sweetness a perfect snapshot of summer. You can capture that essence and carry the bounty of each season into the next with a few simple techniques.
You're about to uncover the art of preserving your favorite fruits right in your own kitchen. From the vibrant strawberries of spring to the crisp apples of fall, each step will guide you in locking in their freshness, ensuring that you can savor the taste of any season, any time of the year.
So, if you're ready to transform your pantry into a haven of homemade delights, let's begin by exploring the initial stages of selection and preparation. But remember, the journey from fruit bowl to preservation involves more than just recipes—it's about embracing tradition, understanding your ingredients, and mastering the methods that will make your efforts worthwhile.
Selecting Suitable Fruits
When preserving seasonal fruits at home, it's essential to choose specimens that are ripe and free from imperfections to ensure the best quality outcome. Your selection process is pivotal in maintaining the nutritional value of the seasonal produce you aim to preserve. Start by eyeing fresh fruits that exude vibrancy and are at their peak in both freshness and flavor. This extra step guarantees a preserved product that mirrors the quality of the fruit in its natural state.
You'll want to bypass any fruits with bruises, blemishes, or signs of spoilage. These imperfections can affect the preservation process, leading to subpar results or even food spoilage. Moreover, not all fruits are created equal when it comes to preserving. Consider the sugar and water content as these factors influence how well a fruit will respond to methods like freezing, canning, or drying.
Also, think ahead to the intended use of your preserved fruits. Whether it's for baking, smoothies, or snacking, selecting the right type of fruit is crucial. By being meticulous in your selection, you'll preserve fruits and vegetables in a way that maximizes taste, texture, and nutritional benefits for later enjoyment.
Cleaning and Prepping
Before you begin preserving your chosen fruits, it's crucial to thoroughly clean and prepare them.
Start by gently washing and air-drying the fruits to eliminate any residual dirt or contaminants, ensuring you pat them dry to prevent ice formation during freezing.
Next, meticulously clean each piece with a produce brush and trim off any spoiled sections to guarantee your preserved fruits remain fresh and flavorful.
Selecting Quality Fruits
To ensure the longevity and flavor of your preserved fruits, start by selecting the freshest, unblemished produce and thoroughly washing and drying each piece. When choosing quality fruits, opt for seasonal fruits which are at peak freshness and naturally ripe. This not only guarantees a richer flavor but also ensures that your fruits are packed with nutrients.
Inspect each fruit carefully, discarding any with bruises or signs of decay. Fresh fruits should feel firm and have a vibrant color. Once you've made your selections, prepare a produce wash or a mild vinegar solution to remove any residue. After washing, dry the fruits completely to prevent any potential mold growth during preservation.
Remember to peel, core, or pit the fruits as needed, and slice or chop them in preparation for your chosen preservation method.
Washing and Drying Techniques
Having selected the freshest fruits, you'll now need to thoroughly wash and dry them to ensure they're free from dirt and residues before preservation. Your washing and drying techniques are crucial in maintaining the quality of your fresh fruits.
- Rinse under water:
- Use cold running water to rinse your fruits.
- For firmer fruits, gently scrub with a produce brush.
Drying methods:
- Pat dry with a clean cloth or paper towel.
- Let them air dry on a clean surface if time allows.
Preventing spoilage:
- Ensure all fruits are completely dry.
- Moisture is the enemy of preservation.
Blanching Before Freezing
Before you stash those ripe peaches or plump berries in the freezer, blanching them is a crucial step to lock in flavor and nutrients.
Start by boiling or steaming your fruit briefly, then quickly cool it in ice water to halt the cooking; this helps maintain texture and color while warding off freezer burn.
Remember to consult a reliable source for the precise blanching times tailored to your fruit, ensuring peak freshness even months later.
Benefits of Blanching
Blanching your seasonal fruits before freezing not only preserves their vibrant colors and essential nutrients but also ensures they retain their fresh flavor and texture for longer periods. By immersing your fruits in a boiling water bath briefly, you deactivate enzymes that could degrade their quality.
Here's why you should consider blanching to preserve fresh fruit:
- Locks in Quality
- Preserves color and prevents browning
- Maintains flavor integrity
- Extends texture resilience
- Enhances Safety
- Cleanses surface of microbes
- Reduces spoilage risks
- Boosts Convenience
- Prepares fruit for easy storage
- Allows for longer-term freezing without quality loss
- Simplifies water bath canning
A splash of lemon juice in the boiling water can further protect the fruit's color and fortify vitamin content.
Blanching Process Steps
Understanding the benefits of blanching your seasonal fruits, let's walk through the essential steps to properly blanch them before freezing to ensure optimal preservation.
Begin by boiling a large pot of water—this is where your fruits will be submerged. While waiting for the boil, prepare a bowl of cold water and ice; this will halt the cooking process immediately after blanching.
Once the water is boiling, place your fruits in a blanching basket or a colander, and submerge them for the recommended time. Different fruits and veggies have varying blanching times, so stick to a trusted guide.
After blanching, quickly transfer them to the cold water. This step is crucial to prevent your precious produce from turning brown and losing texture.
Once cooled, drain thoroughly and pat dry before freezing.
Preventing Freezer Burn
To ensure your fruits remain vibrant and full of flavor after freezing, it's essential to learn how to prevent freezer burn, a common pitfall that blanching effectively counters. Here's how you can master this crucial food preservation technique:
- Start by blanching your fruits.
- Plunge them into boiling water for the appropriate amount of time.
- Swiftly transfer them to ice water to halt the cooking process.
- This step deactivates enzymes, preserving color, taste, and nutrients.
Next, dry the fruits thoroughly to avoid ice crystal formation.
Freezing Techniques
When preserving seasonal fruits at their freshest, consider utilizing freezer bags to lock in peak flavor and nutrients for later enjoyment. Freezing techniques are a reliable method to preserve the bounty of your fruit harvest for longer.
Start by selecting food-safe, high-quality freezer bags to ensure a tight seal against freezer burn.
To maintain the integrity of your fruits, blanching is a smart move. This process, which involves briefly boiling the fruit and then plunging it into ice-cold water, halts enzyme activity that causes spoilage and browning. After blanching, dry your fruits thoroughly to prevent ice crystal formation.
For an innovative twist, try freezing fruit pieces in olive oil or another type of fat. This not only protects them from freezer burn but also creates ready-to-use, flavor-infused ingredients for your future culinary adventures.
Consider pureeing fruits and pouring them into ice cube trays for convenient, portion-sized treats; once solid, pop them out and transfer to freezer bags.
Sugar Packing Method
For a simple yet effective way to preserve your seasonal fruits, consider the sugar packing method, which layers sugar with the fruit to create a natural, sweet preservation syrup. This age-old technique is a tried-and-true way to extend the life of your favorite fruits while maintaining their vibrant flavor and texture.
To master this method, you'll need to:
- Select ripe, unblemished fruits—berries, peaches, and cherries work wonderfully.
- Clean and prepare your fruits, ensuring they're free of stems and leaves.
Here's a quick guide to get you started:
- Layer your fruits and sugar in a sterilized container.
- Start with a layer of sugar at the bottom.
- Add a layer of fruit, then cover it completely with more sugar.
- Repeat the layering process until the container is full.
- Seal the container tightly.
- Ensure the seal is airtight to prevent moisture from entering.
- Store in a cool, dark place or refrigerate to allow the sugar to work its magic.
Wait for the transformation.
- The sugar will draw out the moisture, creating a simple syrup that envelops the fruit.
- This syrup preserves the fruit's color, flavor, and firmness.
Drying and Dehydrating
Venturing into the world of drying and dehydrating, you'll find it's an excellent method to preserve the bounty of seasonal fruits while concentrating their flavors and making them convenient for storage and snacking. Dehydrating food not only extends its shelf life but also transforms its flavor and texture, offering you a unique way to keep your food fresh year-round.
When you're ready to dry foods at home, start by researching and comparing different dehydrators. A good dehydrator will provide an even and consistent airflow, which is crucial for effective drying and dehydrating. Before making a purchase, consider the features and reliability of the models you're interested in.
Once you have your equipment, experiment with various recipes and techniques. Thin, uniform slices will dry more evenly, and pretreating some fruits can prevent browning and enhance flavor. Remember, dehydrating is a simple and efficient form of home food preservation that requires attention to detail. Keep a close eye on your fruits as they dry; the time can vary based on the water content and thickness of the slices.
Dehydrated food is lightweight and easy to store, perfect for creating on-the-go snacks. With practice, you'll master the methods of preserving your favorite seasonal fruits through drying and dehydrating.
Canning Basics
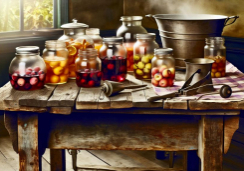
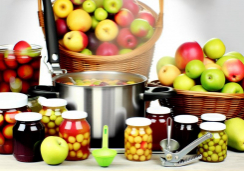
Diving into canning basics, you'll discover that it's an invaluable method to preserve your seasonal fruit harvest for months, or even years, without the need for refrigeration. This traditional preservation method involves sealing your fruits in mason jars and subjecting them to heat, which kills microorganisms and inactivates enzymes that cause spoilage.
- Canning Essentials
- *Mason Jars*: Use quality jars free from nicks and cracks to ensure a proper seal.
- *Lids and Bands*: Match lids and bands to the jar brand and size for a secure fit.
- *Canning Kettle or Pressure Canner*: Choose water bath canning for fruits, but switch to a pressure canner for low-acid foods.
Canning isn't just about tossing fruit into jars; it's a precise science. You must follow specific steps:
- Sterilize your mason jars and lids to prevent contamination.
- Prepare your fruit by washing and cutting it, if necessary.
- Pack fruit into jars, add syrup or water, and remove air bubbles.
- Secure the lid and process in a boiling water bath or pressure canner according to the fruit's processing time.
Creating Fruit Jams
To start creating your own fruit jams, pick the ripest fruits from your garden or local market for a robust flavor foundation. Making sure your fruit is at its peak ensures the richest taste and the best texture for your jam. After selecting your fruit, wash it thoroughly and prepare it by removing any stems, seeds, or peels, as necessary.
Next, combine the prepared fruit with sugar to help with preserving and pectin to set the jam. A splash of lemon juice not only adds a subtle tang but also aids in the gelling process. Cook this mixture until it reaches a thick, spreadable consistency.
While your jam is cooking, sterilize your jars and lids; this is a critical method to preserve your jam properly. Pour the hot jam into these prepared jars, leaving a small space at the top to allow for expansion. Seal them tightly and store in a cool, dark place.
Creating fruit jams is a great option for extending the enjoyment of seasonal fruits. By following these methods to preserve, you'll have delicious, homemade jam to savor throughout the year.
Storing Preserved Fruits
After carefully preserving your seasonal fruits, it's essential to store them correctly to ensure they maintain their taste and freshness for as long as possible. Here's how you can keep your preserved fruits fresh and delicious:
- Use airtight containers
- For dehydrated fruits:
- Ensure containers are completely dry before use.
- A tight seal prevents moisture and air, which can spoil the food.
- For frozen fruits:
- Opt for heavy-duty freezer bags or containers designed for freezing food.
- Remove as much air as possible to avoid freezer burn.
- Label and date your preserves
- On every jar or container:
- Use a permanent marker to write the contents and the date of preservation.
- This helps track how long you've been storing food and when it's best used by.
- Choose the right storage conditions
- For canned and pickled fruits in clean jars:
- Store in a cool, dark place like a pantry or root cellar.
- Avoid places with temperature fluctuations to preserve the food's integrity.
Frequently Asked Questions
How Do You Preserve Seasonal Fruit?
To preserve your seasonal fruit, choose fresh, blanch to retain color, emphasize cleanliness, select appropriate packaging, and don't forget labeling for easy identification. This ensures flavor and nutrition last longer.
What Are the Steps in Preserving Fruits?
To preserve fruits, carefully select ripe ones, use blanching techniques, and adjust sugar concentration. Vacuum sealing retains freshness; dehydration benefits include longer shelf life and intensified flavor. Follow these methods for best results.
Which Method Do You Use to Preserve and Store Fruits at Home?
You'll want to choose ripe, unblemished fruits, blanch them to retain color, then vacuum seal or sugar pack before freezing. Alternatively, master dehydration techniques for a shelf-stable, flavor-concentrated option.
How Do You Preserve Fruit Indefinitely?
You can't preserve fruit indefinitely, but vacuum sealing, increasing sugar concentration, using controlled atmosphere storage, ethanol preservation, and natural fermentation significantly extend shelf life while maintaining quality. Always follow safety guidelines for best results.
Conclusion
Now that you've mastered the 9 steps to preserving your seasonal fruits at home, you'll be savoring their flavors year-round.
Remember to select fresh, high-quality produce and follow these techniques closely to ensure safety and taste.
With a little effort and patience, you'll enjoy homemade jams, perfectly frozen fruits, and delightful preserves whenever you fancy.
Happy preserving, and relish the bounty of your labor!

