Expert-Approved Guide to Canning Seasonal Fruits at Home
As the saying goes, 'A stitch in time saves nine,' and the same wisdom applies when you're preserving the bounty of the season through canning. By learning how to properly can seasonal fruits at home, you're not just preparing for the future, you're ensuring a year-round supply of your garden's or local market's best offerings.
You'll need to be well-versed in the essential equipment and techniques that guarantee your efforts are not in vain. From selecting the ripest fruit to understanding the nuances of water bath versus pressure canning, this guide has been meticulously crafted to set you up for success.
However, there are certain pitfalls only the experienced know to avoid, and as you equip yourself with this knowledge, you'll find that the line between good and great home-canned fruit is in the subtle details that I'm about to share.
Essential Canning Equipment
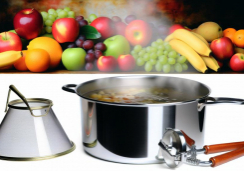
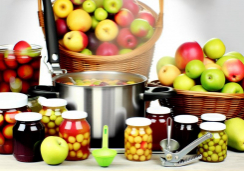
To ensure a successful home canning experience, you'll need a few key pieces of equipment. These include a boiling water bath or pressure canner and glass jars with secure lids and bands.
First, inspect your canning jars for any cracks or chips. It's important to do this because imperfections can compromise the seal.
When it comes to filling jars, a wide-mouth funnel is your ally. It allows you to neatly hot pack your fruits without spills.
After filling, it's crucial to remove air bubbles. You can do this by sliding a non-metallic spatula along the inside edge of the jar. This step ensures even distribution of heat during processing and prevents potential spoilage.
Pay attention to the recommended headspace. This is the gap between the food and the jar top. It allows for expansion during heating.
Once your jars are ready, use a canning rack to lower them into the water bath canning pot or pressure canner. A jar lifter or tongs are indispensable for safely handling the hot jars.
After processing, use these tools again to carefully remove the jars. Then, let them cool on a protected surface.
Once they're cool, you can remove the screw bands, check the seals, and store your bounty for the coming months.
Preparing Your Fruit
Selecting high-quality, ripe fruits devoid of diseases and bruises is your first step in the canning process to ensure a delicious and safe preserved product. Canning fruits at their peak, when they're fully ripe, guarantees the best flavor and nutritional value.
Here's how to prepare your fruit:
- Wash and Sort
- Rinse fruits thoroughly under running water.
- Remove any damaged or overripe areas.
- Sort fruits by size for even cooking.
- Prevent Darkening
- Toss sliced fruits with ascorbic acid or a solution of lemon juice and water.
- This step helps prevent browning and maintains color and flavor.
- Pack and Process
- Fill the jars with raw fruit or precooked fruit in hot syrup, depending on your recipe.
- Ensure to remove air bubbles and wipe the jar rims for a good seal.
- Process in a boiling water canner or pressure canner as recommended for acid foods.
Canning Techniques Explained
Now that you've prepped your fruit, it's crucial to understand the canning techniques available to preserve your bounty safely and effectively. You'll mainly encounter two canning methods: boiling water bath canning and pressure canning. Both are reliable for food preservation, but they differ in process and suitability for various types of food.
Boiling water bath canning is ideal for high-acid foods like fruits. You'll use a water bath canner, a large pot with a rack to hold jars off the bottom. Fill the jars with your prepared fruit, ensuring to remove any trapped air bubbles. Wipe the rim to secure a good seal, then place them in the hot water bath. The processing time varies with the fruit type and jar size but is typically around 10 to 20 minutes after the water returns to a boil.
Pressure canning, on the other hand, is necessary for low-acid foods but can also be used for fruits. It uses a specialized pressure canner to achieve higher temperatures. This method is more intricate, requiring careful monitoring of pressure and processing time.
Regardless of the method, use jar lifters to handle hot jars and always follow manufacturer guidelines. Properly canned, your fruit will be a delightful treat year-round while reducing food waste and ensuring safety.
Storing Your Canned Goods
After meticulously sealing your jars of seasonal fruits, finding the right spot to store them—a place that's cool and dry—will ensure they remain at their peak quality. Proper storage is key to maintaining the flavors and safety of your canned foods.
- Store Your Canned Goods Correctly
- *Choose the Right Location*
- Keep jars at room temperature, ideally between 50°F and 70°F.
- Find a dark place away from direct sunlight to prevent discoloring and nutrient loss.
- Avoid areas with drastic temperature changes, such as near a stove or heating duct.
- *Ensure Jars are Properly Sealed*
- Check the rim of the jar for any food residue that might prevent sealing.
- Press the center of the lid; if it's firm and doesn't pop, your canning process was successful.
- Any jars that haven't sealed should be refrigerated within 24 hours and consumed quickly.
- *Organize and Monitor*
- Label each jar with the contents and date of canning to keep track of freshness.
- Rotate your stock, using older items first to ensure quality.
Troubleshooting Common Issues
While proper storage is essential for maintaining the quality of your canned fruits, it's equally important to know how to address issues when they arise during the canning process. Troubleshooting common issues can save your batch from spoilage.
If you find the center of the lid hasn't sealed after the prescribed time, don't fret. You can reprocess the jars within 24 hours or refrigerate the contents for immediate use. Before you start, inspect your jars and lids for any cracks, chips, or defects that might prevent a good seal. Always ensure the jar rim is clean for the lid to adhere properly.
When canning at different altitudes, adjust your processing times to ensure a secure seal and safe preservation. Failure to do so can lead to underprocessing, which puts your fruits at risk of spoilage.
Use a bubble remover to release trapped air before sealing, as this is a common culprit in sealing failures. Sterilize your equipment thoroughly and follow an up-to-date, scientifically tested canning recipe to avoid mishaps.
Lastly, when processing, set a timer to avoid over or underprocessing. Once the time is up, remove the jars carefully and let them cool undisturbed. With these practical steps, you'll confidently tackle the challenges of home canning.
Frequently Asked Questions
What Fruits Are Seasonal for Canning?
You'll find that choosing berries, local varieties, and organic choices from picking orchards or market selections, based on fruit ripeness and climate influences, offers the best preservation benefits for seasonal canning.
What Foods Cannot Be Home Canned?
You can't safely can dairy or starchy foods like butter and flour at home; they pose botulism risks. Meat preservation and non-acidic vegetables require pressure canning to avoid unsafe practices and improper sealing.
Which Fruit Is Most Suitable for Canning?
You'll want fruits high in acidity and pectin, like apples or berries, for canning. They'll retain texture, flavor, and color better. Ensure they're mature, peel if needed, and use proper sterilization methods.
How Long Is Home Canned Fruit Safe?
Your home-canned fruit's safe for a year if you've got proper sealing, storage, and sterilization. Watch shelf life, check pH levels, and use the right jars to reduce botulism risks and preserve freshness.
Conclusion
Now you're set to preserve the bounty of the season with confidence! Remember to sterilize your jars, prep your fruit properly, and choose the right canning method.
Store your jars in a cool, dark place and always check seals before use. If you encounter issues, consult troubleshooting tips.
Happy canning! Enjoy your homemade delights year-round and take pride in your self-sufficiency and creativity in the kitchen.

