Jam Packed: Canning Fruit Like a Pro
Just as Odysseus faced numerous trials to perfect his journey home, you too must navigate the intricate art of canning fruit to achieve the sweet taste of success.
You're about to embark on a quest where the ripest fruits become jewels sealed in glass, a process blending tradition with science. It's a method that requires precision; you'll need to understand the synergy between pectin and sugar, all while keeping a keen eye on sterilization and safety.
But don't worry, you're not alone on this voyage. Equipped with the right knowledge, you can transform seasonal bounty into a pantry of delight that endures through the seasons.
Yet, there's more to this craft than meets the eye, and as you stand on the brink of this culinary adventure, one must wonder: what secrets do the pros hold that can elevate your preserves from simple homemade concoctions to artisanal masterpieces?
Selecting the Perfect Fruit
When selecting fruit for canning, opt for specimens that are at their peak of freshness and firmness to ensure a high pectin content and superior end result. Fresh fruit contains natural pectin, most concentrated in the skins and cores. This is why you often need to peel fruits only partially or keep them whole; those like red cherries, peaches, and apricots are higher in pectin when their protective layers are intact.
Different fruits have varying levels of natural pectin. Delicate fruit that's overly ripe may have lower pectin content due to the enzymes breaking it down into pectic acid. To achieve the perfect jam consistency, balance is key. Use a mix of just-ripe and slightly under-ripe fruit. The ripe fruit contributes flavor and sweetness, while the less ripe adds pectin.
Remember, heat is your ally in canning. It activates the pectin and helps reach the gel point, essential for a well-set jam. But don't rush the process. Slowly increase the temperature to around 220°F, ensuring the sugar concentration is adequate, roughly 65%, to form the perfect gel structure without encouraging microbial growth.
Mastering fruit selection is an art, but with these guidelines, you'll lock in the finest flavors and textures for your home-canned delights.
Preparing Jars and Equipment
Having mastered the art of selecting the perfect fruit, it's time to ensure your jars and equipment are prepared to match the quality of your canning contents. Begin by sterilizing your canning jars, lids, and all other equipment thoroughly. This is vital for safe home canning and preventing contamination.
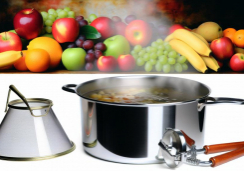
First, fill your Water Bath Canner with enough water to cover your jars of jam by at least one inch. Bring the water to a simmer while you prepare your jam. Place the canning rack inside to keep jars from touching the bottom and potentially breaking. Next, place your clean jars in the simmering water to keep them hot until they're ready to be filled. Hot jars prevent breakage when filled with hot jam and during processing.
Once your jam is ready, remove the jars from the canner using a jar lifter, ensuring your safety from the boiling water. Pour the jam into the jars, maintaining a 1/4 inch headspace. Wipe the rims with a damp kitchen towel, secure the lids, and return the jars to the canner using the jar lifter. Process for the recommended processing time to seal the jars. This step is crucial for preservation and ensuring your delicious jam remains safe to enjoy.
Cooking and Testing Jam Consistency
How do you ensure your jam reaches the perfect consistency?
Jam making is both an art and a science, requiring attention to detail and a bit of patience. To start, always follow the recipe. The ratio of fruit to sugar is critical; too little sugar and your jam won't properly set, too much and it could crystallize.
As you cook the jam, remember that it's not just about boiling the fruit—the amount of sugar and the natural pectin in the fruit skins and cores come into play.
Heat is your ally here. You're aiming for the gel point, typically around 220°F, where pectin-rich fluids create a web-like structure that thickens the jam. But don't rely solely on temperature; testing jam consistency is key.
The frozen spoon test is a reliable method: drop some jam onto a spoon that's been chilled in the freezer, then return it to the cold. After a minute, push the jam with your finger. If it wrinkles, it's set.
Filling and Sealing Jars
Before you begin filling your jars with jam, ensure they're sterilized to prevent any risk of contamination. Most jam recipes you'll come across call for a mix of fruit, sugar, and often lemon juice adds a necessary acidic balance. Once your jam is ready, it's time for hot canning.
Fill each jar, leaving exactly a 1/4 inch headspace at the top. This space is crucial as it allows the jam to expand without overflowing.
Next, wipe the rim clean and tighten the lid to a point that's firm but not overly tight; air needs to escape during the sealing process. Now, it's time to place your Jars in the Water Bath. Using a Water Bath ensures a secure seal and helps maintain the fruit's quality.
Carefully lower the filled jars into the canner, making sure they're covered by an inch of boiling water. Process the jars as your recipe directs.
Once done, lift the jars out of the water using a jar lifter and let them cool. Check the seal after 24 hours; the lid should be indented, and you might hear a satisfying 'ping' as the jars fully seal. If the lid flexes up and down, the seal hasn't formed properly, and you'll need to reprocess the jar or refrigerate and consume it promptly.
Water Bath Canning Process
Are you ready to dive into the water bath canning process, where precision and timing ensure your homemade jam retains its fresh, delightful taste? This method is favored for preserving fruits, and it's crucial to adhere to the USDA's safety guidelines.
Start by filling your canner with enough hot water to cover the jars by at least one inch. Then, preheat the water to the temperature of the hot pack method you're using.
Next, place your jars filled with jam and added sugar for preservation into the canner using a jar lifter. Ensure that the water level is adequate and bring it to a rolling boil. Once boiling, process the jars for the time recommended by a trusted recipe, adjusting for altitude if necessary.
Remember that proper acid levels are essential for food safety in water bath canning. Some fruits may require additional acid to make them safe for canning.
As the jars boil, the combination of heat and time will kill off harmful bacteria and create a vacuum seal as they cool.
Frequently Asked Questions
Does Jam Preserve Fruit?
Yes, jam does preserve fruit. You'll harness natural preservatives like pectin levels, sugar's role, and acidity balance. Proper sterilization ensures flavor development and nutritional retention, despite seasonal variations in fruit quality and texture considerations.
Which Fruit Is Most Suitable for Canning?
You'll find fruits high in pectin, like apples and berries, most suitable for canning, considering their acidity levels, sugar content, and texture. Seasonal choices ensure flavor retention and nutritional value with optimal skin thickness and color stability.
How Do You Can Jam for Long Term Storage?
To can jam, you'll sterilize jars, use correct sugar ratios, and add pectin and acid. Seal with a water bath to vacuum seal. Store in cool conditions and label with flavor and date.
How Do You Make Jam More Spreadable?
To make your jam more spreadable, adjust sugar ratio and pectin levels, monitor cooking temperature, perfect your stirring method, pick ripe fruit, add acid, and skim foam. Test consistency, control water content, and store properly.
Conclusion
You've expertly navigated the jam-making journey, from handpicking ripe fruit to mastering the water bath canning technique. Now, with jars cooling and seals setting, savor the satisfaction of your homemade preserves.
Remember, each batch reflects your care and skill. Store your creations in a cool, dark place and enjoy the fruits of your labor all year round.
Keep honing your craft — you're not just making jam; you're crafting tradition.

